SPONGEBOB SQUAREPANTS!
 |
| This is the background party setting. I purchased this online at Oriental Trading. Yes, we made a mustache for Spongebob :) |
Well the kiddies combined birthday party has come and gone. Everything turned out fantastic. We had a full house and tons of yummy food to eat. The weather turned out to be amazing. We had games set up for this kids, but they were having so much fun we never even played them.
I had stations set up around the house to ease congestion and have different areas for everyone to hang out.
In the dining room I set up a coloring table for the kids to enjoy. I went online and printed out free Spongebob coloring pages. I picked up a couple boxes of crayons from the dollar store and it was complete. I ended up putting the leftover stickers on the table as well for the kids to use.

I put together adorable “Chum Buckets” for guests to pick up for a sweet snack. We filled them with s'mores and cupcake goldfish (which everyone raved about.) I purchased clear punch cups from Meijer covered the cups with card stock and hot glued pipe cleaners on for handles. They still seemed kind of plain to me so I created a Chum Bucket label on Picnik. I cut ribbon and tied them around the handles to make them a little more festive. They were simply adorable!

We had an assortment of drinks such as lemonade, ice water and soda. Since this party was for a little girl and boy I decided to incorporate pink into the mix with the cups.

On the beverage table I also had krabby patty cookies set out on a serving tray.
To make the Krabby Patty Cookies you will need:
Vanilla Wafers ( I purchased mine at Dollar Tree)
They were fantastic and tasted great, no one knew any different.
Coconut dyed green for lettuce (also purchased at Dollar Tree)
Red Frosting
Yellow Frosting
Keebler Grasshopper cookies for patty.
Place a small dot of icing on the bottom of a vanilla wafer. This will act as your bottom hamburger bun.
Place a grasshopper cookie on the vanilla wafer. Place a small amount of red and yellow frosting.
Cover your “ketchup and mustard” with the coconut lettuce and top off with your “top bun” which is actually a second vanilla wafer.
These are so easy to make and they were gobbled up in no time. Everyone was very impressed and I was not had to do at all.
For an hor dourves that was simple, cheap and something everyone loves I came up with popcorn :) I made my classic stove top version. I put it in three yellow CLEAN sand buckets and placed them around. The shovels were used as a scoop.

For the main dish we set up a burger bar. We had options for everyone and each person got to create their own Krabby Patty. It was also a hit.


The kids requested Krabby Patty Birthday Cakes. I whipped them up the night before. I was on a tight budget and actually was running out of fondant! Oh well...I rolled that baby thin and patched where I needed too. The cake tasted great and they were so fun to look at.

We rented a helium tank from our local True Value. The cost was $38 including tax and we filled well over 100 balloons! I once again purchased the balloons at The Dollar Tree. This rental not only saved me money, it was a huge stress relief knowing I did not have to haul 100+ inflated balloons to my house in my car. That alone was worth the money.
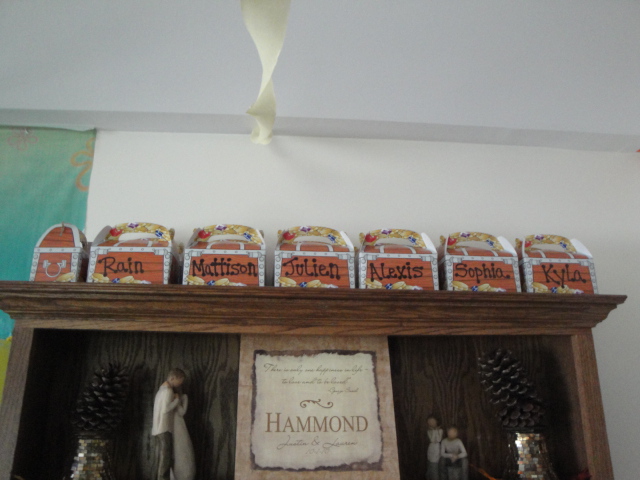
I did have plastic lays for everyone to wear if they choose so. I purchased those at Party City. Each child went home with their own treasure box filled with goodies. I got sparkly tissue paper and put a piece bunched in the bottom for a filler. I had a variety of candies such as Nerds, Laffy Taffy, Smarties, Bottle Caps, Fizz Suckers and Tootsie Rolls in each box.
I passed these out after we opened gifts and this kids went crazy!

Everything was smooth and turned out great. My kids actually are talking about combing a party again next year and that sounds like success to me <3
Until next time. Party On!