Showing posts with label Cooking. Show all posts

Tuesday, January 17, 2012

Easy And Delicious Healthy Omelet


Good Morning!


Today I am so excited to show you a super energizing breakfast. This dish is easy to prepare and packs in a ton of healthy elements.

The finished meal has 271 Calories, 9 carbs, 14g fat, and a whopping 32g of protein! This dish is sure to keep you full.

Garlic & Onion Flax Seed Omelet


I promise if you enjoy warm comfort food this is right up there. My husband is no fan for eggs, and he was pleasantly surprised. So take a go at it. Change the spices around and see what is good for you. I am a serious garlic lover so I do go heavy on my seasonings. :)

Prep your pan with extra virgin olive oil and heat it nice and hot on medium. I use about a tablespoon. I like to do this so the pan is ready to go when I have all my food prepped.


You will start with 3 egg whites and 1 whole egg.


If you are a beginner with flax I suggest starting with a ½ tablespoon. This will add a delightful flavor to your eggs so don't be afraid. It will also not have any weird gritty texture. I buy bulk flax seeds and grind them in my coffee grinder. Add as much flax as you like, but I go with 2 tablespoons.


I love the depth and color it adds to the eggs. Did you know that 2 tablespoons of ground flax will add 4 grams of fiber to your diet? That is nearly a quarter of your recommended daily value of 20 to 30 grams!

You will also add in a teaspoon or more or garlic powder and a teaspoon or more of onion powder. Mix well. Your pan should be ready to add your eggs. Having your pan on medium or slightly higher will heat your oil nicely. It is important having the pan hot enough or your eggs will just run everywhere. When the pan is hot they will stay together and keep your omelet in a nice round shape.


This dish cooks nice and quick. Your omelet should be ready to flip within a couple minutes.


I watch the edges as a guide. Once it looks nice and fluffy with a slightly undone center your ready to flip.


It will have a nice golden brown color. At this point you can turn your pan down and prep your cheese. I like to use 2 slices of 2% American cheese. It will turn out nice a gooey. Place your cheese on one half. Once your cheese or filling of choice is in flip the other side on top. Your Done!!!


Time to indulge! Being healthy is not so bad :)


Enjoy!


Wednesday, January 11, 2012

How To De-Fruit A Grapefruit


Happy Wednesday Everyone!


With the new year here like many others I have committed to losing weight. I have actually discovered a new found love that is making weight loss easier then ever. Grapefruit! That last time I had tried grapefruit was about 12 years ago. It was so bitter I could not enjoy it. Well I decided to try it again due to it health benefits and link with weight loss.

The first attempt to eating a grapefruit was awful. I had no idea how to eat it and it was very annoying and deterring trying to DE-fruit it. Well shortly after I figured it out. I also pair my grapefruit with Raw Stevia which is a zero calorie sweetener and I am now IN LOVE!!! I love this fruit so much I eat 2 a day. It is so succulent and satisfying.

Today I am going to show you my way of De-fruiting a Grapefruit.


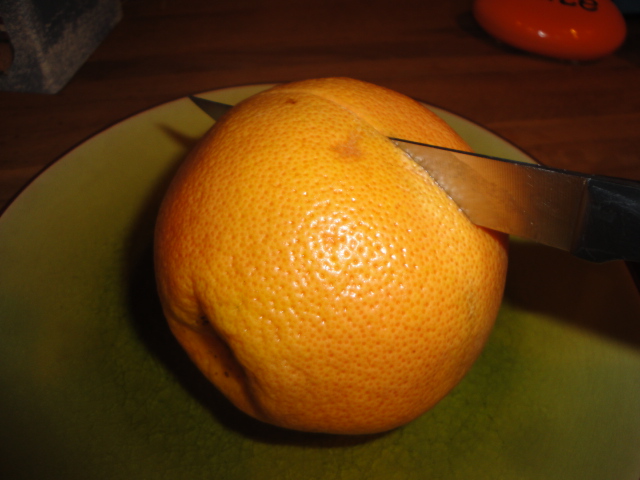
Start by washing and cutting your grapefruit in half.


Gently pop out any visible seeds.


Take your knife and slice all the way around the edge of the fruit. This will separate the juicy center from the outer skin.


You will notice a thin skin separating each wedge of the fruit. Gently but firmly pierce your spoon between the fruit and the skin. This will take practice but I PROMISE you will get the hang of it the more you do it.

With a slight rotation of your wrist you will easily be able to pop the fruit wedge right out!


Continue on around the fruit.


Squeeze the remaining juice from your fruit and top with a sweetener of your choice. Your done! Enjoy this delicious fruit full of health benefits!

Until next time my friends! Enjoy.


Saturday, November 26, 2011

My Favorite Thanksgiving Recipes


I hope everyone had a very special and happy Thanksgiving.

My family celebrates Thanksgiving three times, so I am spoiled with great food for a week or more. This thanksgiving we had so many delicious dishes it was hard for me to pick just one to share. I always have good luck with picking recipes, and everyone always requests for copies. With that being said I have decided to share my a few of my favorite Thanksgiving dishes. Enjoy!


I am going to start with sharing the Sweet Potato Casserole from allrecipes.com. I have made this three times this week and each time everyone raved about the rich sweet taste.


I have made it with and without the eggs added and it turned out great each time. Once you try this I have a good feeling this will be the staple on your next menu.


My second favorite dish I tried this year was a Feta Dip. This is simply heaven. It is light yet filling. You have so many options for breads or dippers. This fantastic recipe was found on great blog called Clover Lane. Take this to your next party and watch the magic happen. Pita bread, french bread, even crackers would be a fantastic side with it.
055

I threw this dish together with a couple moderation's and it was still perfection. I had cans of diced tomatoes so that is what I opted to use. Ah-Maze-ING! Simple! Love it! This seriously was about a 10 minute prep including cutting the bread. I also did not have Greek Seasoning so I used Oregano, Salt and Pepper as suggested. Bravo!


Two words. Snickerdoodle Blondies.

My brother in law loves Snickerdoodle cookies, and he could not get enough of this sinfully delicious dessert. This recipe was found on a hilarious blog called Delightful Bitefuls. She has so many amazing dishes listed. To make this dish even better, most every home kitchen has all the ingredients with out a special trip out. Try it. Love it. Make it again.


All pictures and recipes were from the original sources mentioned in this blog.

Thank you!


Wednesday, November 9, 2011

Kale Chips

Baked Kale – Kale Chips


Have you ever wanted to track your calorie intake, but do not have the time to do all that math and figuring? Well, there is an amazing website called Spark People. At www.sparkpeople.com you can pick a goal weight and date and the site will give you detailed guidelines, informative information and amazing software all for FREE! I LOVE Spark People. Currently I am getting back into the groove after having my Ah-Ha moment and realizing I need not only a diet, but a lifestyle change. I love this site because not only is it free, it works and you can choose to build a spark page to become friends with other spark users as support and motivation.


With all of that being said I am overhauling my life and my family's life. I have been introducing and re introducing new foods to everyone in my house. The latest adventures have been Grapefruit, in witch my children loved with a tablespoon of sugar on top. I also made Kale Chips. I have never eaten Kale in my life so I did not know what to expect when making these. Here is what I did.


Gather One bunch of Kale

Tablespoon of Olive Oil

Sea Salt or Kosher Salt

This is the bunch of Kale to start.


First you will start with pulling apart your kale and ripping the leafy part from the thick stem. Tear or cut the whole bunch into smaller sizes. Rinse and dry the kale very well. If you do not dry the kale well after washing it will take a lot longer to bake.


Rinse and Dry Well.

Pile it all right up and bake.

In a large bowl toss together the Kale, Olive Oil, and Sea Salt together. Preheat your oven to 350*. Grab a large baking sheet and pile the Kale right on that bad boy. Don't worry about it looking over crowded. The Kale with shrivel tremendously while drying out. Set your timer for 10-15 minutes. Make sure to check around 10 minutes to see how it its baking. I cooked mine until it was nice a crispy. I was impatient along with my children to taste this goodness, so we took it out a couple times and picked out the finished bits. Make sure not to over cook or it will result in a not so pleasant taste of burnt greens.


Wha-La! Your Done!


Go ahead step out of the box and try it. Feel free to season with anything not just salt. You could use ranch packets, garlic, curry, onion, salt and vinegar anything really. A bunch of Kale cost me $1.79 so it is very friendly on your wallet to try something new... tastey and healthy.


I would love to hear other healthy snacks that you like to eat. So please leave a comment and share!


Until next time...

Saturday, October 29, 2011

Simple Solutions

Finally!

Have any of you heard of the website Pinterest? Well if not, immediately after reading this post it is a must to add to your to do list. It is pretty much a virtual pin board of all your favorite things. You can organize it anyway you way and “follow” as many people as you would like also. They even give you an option to add a button to your favorite bar so you can “pin” anything you want. Simply said..I am in love :)

I have tried many things I have found on Pinterest that are purely genius. I wish I would claim that I discovered them myself. Be prepared these will change your life.

At some point you have had nasty fruit fly's that would just not go away. You spend hours searching for whatever the cause is, and you find nothing. Well I have a cure!

Pour roughly 1c of Apple Cider Vinegar and a squirt or two of dish soap into a bowl. Place the mixture where you are noticing the most fruit fly's hanging out. Now prepare to be amazed.

Check back in a couple hours and you will notice your trap is taking care of your little problem. Works like a charm. I swear I will never stress about fruit fly's again. I have even left out a bowl of this mixture out for a couple days at a time and it will still continue to attract the little pests.

Ah. Maze. Ing!

All of us busy parents have juggled getting dinner ready, picking up the house, going though school paperwork, listing to Mom,mom...mom,mom...then we notice the pasta we are cooking is boiling over everywhere.
Well for ages my resolution was to blow on the foam make it go down and turn the water down...well worry no more.
Just simply place a wooden spoon over your pot of boiling water and once again, be amazed. I actually tried this one out tonight and it was shocking. I purposely tried boiling my water over and it would not happen. Go ahead cook that pasta, clean the kitchen, get through all that backpack paperwork. Just make sure you don't forget about your noodles so they won't turn to mush. :)

I would love to hear what fun tips you might have that will save all of us our sanity in the simplest ways.

Happy Halloween Everyone!